Guide to High-Quality Text-to-Audio Conversion Using Open-Source TTS
This guide provides a straightforward solution for converting text into audio using an open-source text-to-speech (TTS) model available on Hugging Face. We will leverage the Coqui TTS library to generate high-quality audio files from text. Additionally, we will incorporate Python tools for audio analysis, focusing on key audio attributes. This resource is aimed at both beginners and experienced developers.
1. Setting Up the Environment
To begin, ensure that you have the necessary tools installed in your Python environment. The first step is to install the Coqui TTS library.
- Run the command:
!pip install TTS - This installation allows you to access essential TTS functionalities quickly and efficiently.
2. Importing Required Libraries
Next, you will need to import the required libraries to facilitate text-to-speech synthesis and audio analysis.
        from TTS.api import TTS
        import contextlib
        import wave
These libraries are crucial for executing TTS functions and performing audio analysis using Python’s built-in functionalities.
3. Converting Text to Audio
The core functionality of this guide involves creating a function that converts text to audio. The following is a simplified version of the TTS function:
        def text_to_speech(text: str, output_path: str = "", use_gpu: bool = False):
            model_name = "tts_models/en/ljspeech/tacotron2-DDC"
            tts = TTS(model_name=model_name, progress_bar=True, gpu=use_gpu)
            tts.text_to_file(text=text, file_path=output_path)
            print(f"Audio file generated successfully: {output_path}")
This function allows you to input text, specify an output path for the audio file, and choose whether to use GPU for processing.
4. Analyzing Audio Files
After creating your audio file, it’s beneficial to analyze its properties to ensure quality. The following function provides insights into the audio characteristics:
def analyze_audio(file_path: str):
with wave.open(file_path, 'rb') as wf:
frames = wf.getnframes()
rate = wf.getframerate()
duration = frames / float(rate)
sample_width = wf.getsampwidth()
channels = wf.getnchannels()
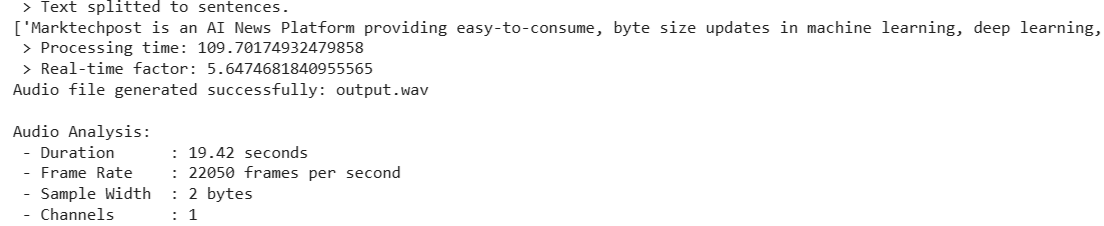
print("nAudio Analysis:")
print(f" - Duration: {duration:.2f} seconds")
print(f" - Frame Rate: {rate} frames per second")
print(f" - Sample Width: {sample_width} bytes")
print(f" - Channels: {channels}")
This function opens the specified WAV file and outputs details such as duration, frame rate, sample width, and channel configuration.
5. Practical Example
Here is how to integrate the functions into a practical example:
        if __name__ == "__main__":
            sample_text = "Marktechpost is an AI News Platform providing easy-to-consume updates in machine learning, deep learning, and data science research."
            output_file = "output_audio.wav"
            text_to_speech(sample_text, output_path=output_file)
            analyze_audio(output_file)
This script synthesizes a sample text into an audio file, then analyzes the generated audio file’s attributes.
Conclusion
In summary, this guide outlines how to effectively use open-source TTS tools to convert text into audio while simultaneously performing a diagnostic analysis of the audio file. By utilizing the Hugging Face models via the Coqui TTS library, alongside Python’s audio processing capabilities, you can create a seamless workflow for speech synthesis. Whether your goal is to develop conversational agents or automate voice responses, this foundational knowledge allows for customization and expansion in your projects.
For further assistance in implementing AI solutions in your business, please contact us at hello@itinai.ru or connect with us on Telegram, X, and LinkedIn.